10-Day .Net Aspire Challenge: Day 1 — Introduction
Step-by-step guide on how to use the .Net Aspire framework in Visual Studio.
Introduction
.Net Aspire framework is used to develop cloud and production-ready distributed applications. It consists of components to handle cloud-native concerns such as Redis, Postgres etc.
Prerequisites
Install .Net 8
Install Visual Studio 2022 version 17 or higher
.Net Aspire Workload
Container runtime such as Docker Desktop
Objectives
- Learn how to create a starter project using .Net Aspire templates.
Getting Started
Step 1: Open Visual Studio
Open Visual Studio, and then select “.Net Aspire Starter App” as shown below
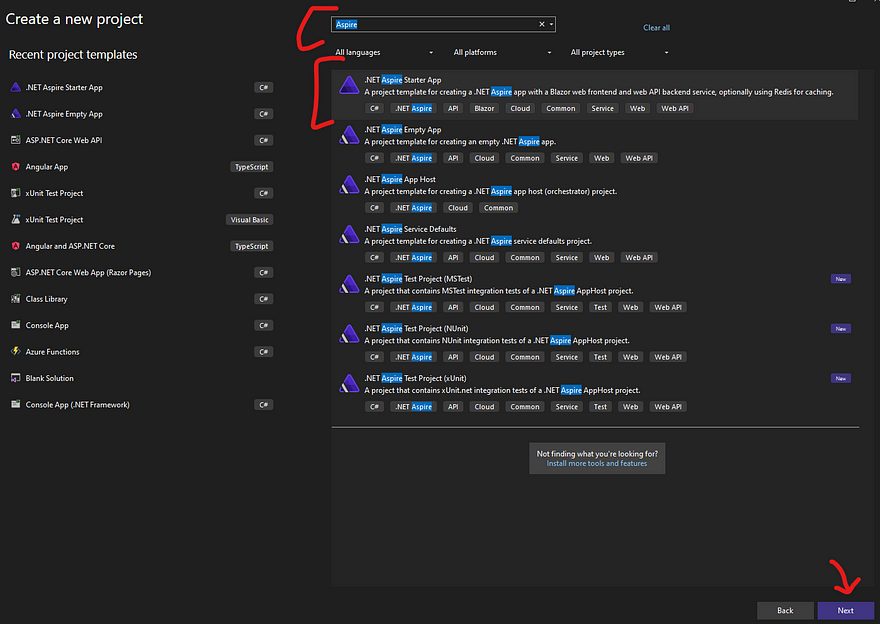
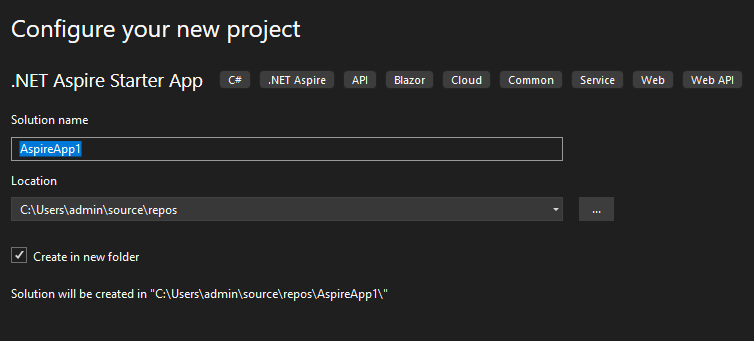
Step 2: Provide the project name
Provide the project name and project directory.
Step 3: Select Frameworks
The next step is to select the applicable frameworks, and check “Configure for https”.
Note: Select “Use Redis for caching” only if the docker container is up and running.
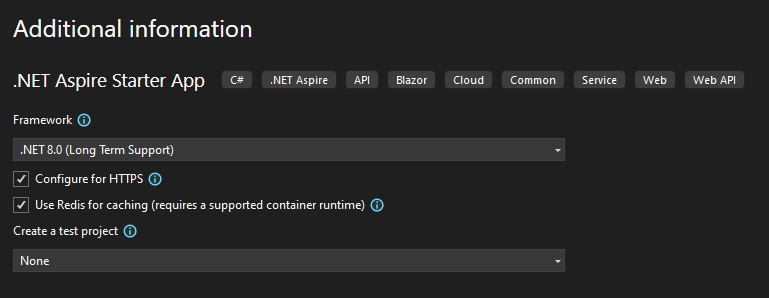
and finally, click the “Create” button at the bottom.
Step 4: Understand the Solution Structure
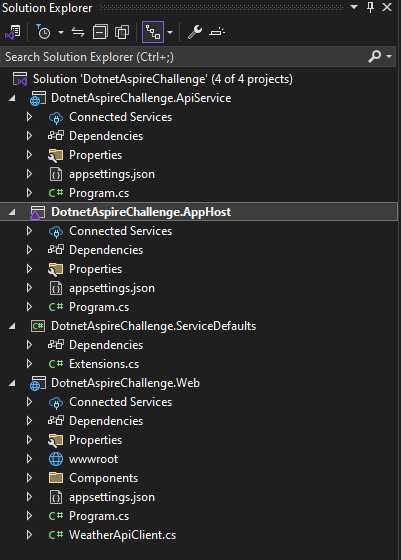
The solution consists of 4 different projects as follows [If a test project is selected then an additional test project will be available]
DotnetAspireChallenge.ApiService: An ASP.Net Web API project is used to provide data for the web application.
DotnetAspireChallenge.AppHost: An orchestrator project to connect and configure multiple projects and services.
DotnetAspireChallenge.ServiceDefaults: A shared configuration manager for all of your projects and services.
DotnetAspireChallenge.Web: A blazer web application that connects with “DotnetAspireChallenge.ApiService” to fetch data.
Step 5: Run the project
Set “DotnetAspireChallenge.AppHost” as the startup project and run the project as shown below.
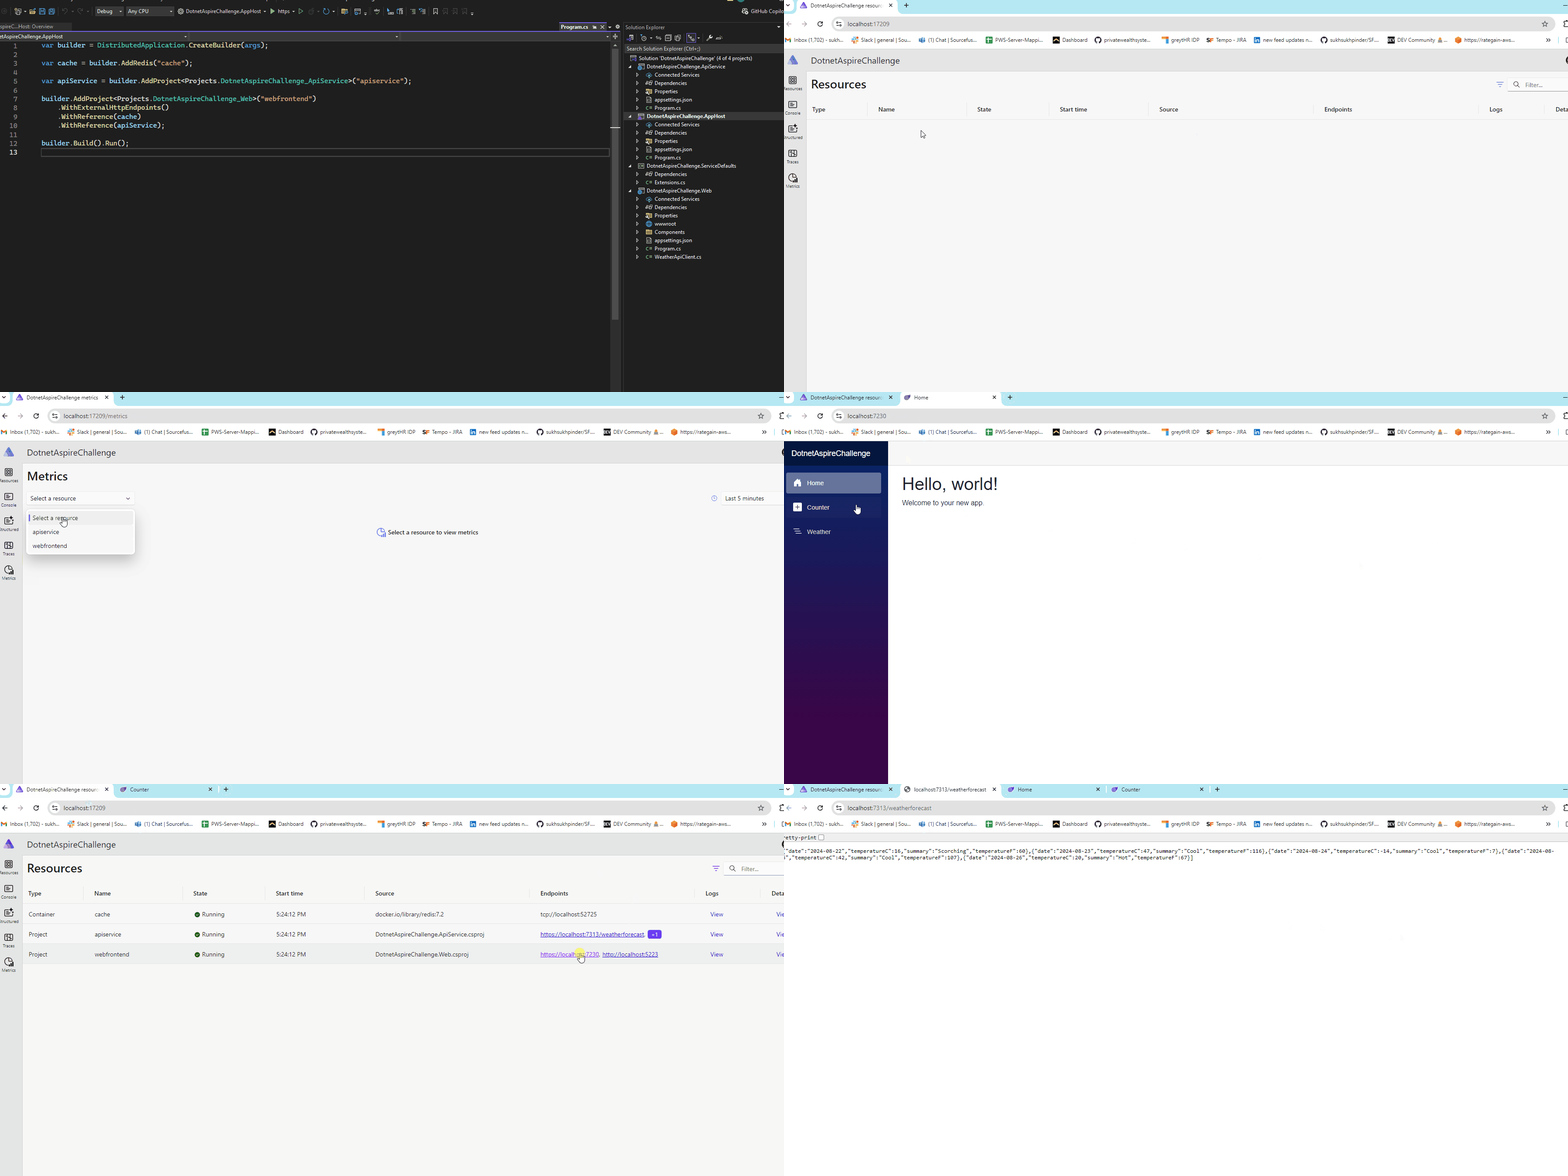
Congratulations..!! You’ve created your first .Net Aspire project.
Github Project
GitHub - ssukhpinder/DotnetAspireChallenge: 10 Day .Net Aspire Challenge
C# Programming🚀
Thank you for being a part of the C# community!

